
A smooth cabinet finish with a paint sprayer means the paint levels evenly across cabinet doors, drawer fronts, rails, and frames without rough texture, runs, or heavy edges. It matters because cabinets sit at eye level and show every flaw under kitchen lighting.
This article explains the prep, paint choices, sprayer settings, accessories, and correction methods that help create cleaner cabinet results. It focuses on practical finish control rather than just spraying faster.
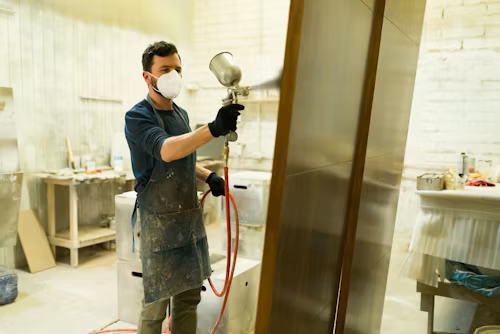
What Creates A Smooth Cabinet Spray Finish?
A smooth spray finish starts long before the first coat lands on the cabinet. Cleaning, sanding, priming, dust control, paint filtering, and steady spray movement all affect how the final surface looks.
Grease is one of the biggest problems on kitchen cabinets. Even a thin layer of cooking residue can cause poor adhesion, fisheyes, or uneven sheen. Before sanding, cabinets should be degreased thoroughly so the surface is clean enough for primer.
A smoother surface usually starts with best paint sprayer for cabinets for professional finish because better atomization helps cabinet coatings land in finer, more even particles instead of heavy droplets.
The biggest difference in paint sprayer for cabinets quality and performance often appears in how consistently the unit handles thicker cabinet paints, primers, and enamels without pulsing or spitting.
| Finish Factor | Why It Matters |
| Surface cleaning | Removes grease that can block adhesion |
| Light sanding | Helps primer grip glossy cabinet surfaces |
| Paint straining | Reduces clogs and spray defects |
| Fine atomization | Creates a smoother, more even coat |
| Controlled airflow | Limits dust, overspray, and rough texture |
A smooth finish is not created by one heavy coat. It usually comes from several thin, controlled coats that have enough time to level and dry properly.
Good coating choice is the next part of the finish-quality equation.
Paint, Primer, And Sheen Choices For Cabinets
Cabinet paint must handle touching, wiping, cooking moisture, and daily wear. Standard wall paint often stays too soft for cabinet doors, especially around handles and edges. A cabinet enamel, trim enamel, or durable acrylic-urethane coating usually performs better.
Primer also matters. Cabinets made from stained wood, oak, laminate, or previously painted surfaces may need a bonding primer, stain-blocking primer, or shellac-based primer depending on the surface condition.
A good primer helps:
- Improve paint adhesion
- Block tannin bleed from wood
- Reduce grain visibility
- Create a more uniform base
- Improve color coverage
- Lower the risk of peeling
Sheen affects both appearance and maintenance. Satin and semi-gloss finishes are common for cabinets because they are easier to wipe than flat paint. However, glossier finishes show surface defects more clearly, so prep becomes even more important.
Paint should be mixed well and strained before entering the sprayer cup. Tiny dried paint pieces can cause spitting, interrupted spray patterns, or rough spots that remain visible after drying.
Once the coating is ready, the sprayer’s controls determine how evenly it reaches the cabinet.
Sprayer Features That Improve Finish Control
The best cabinet results come from sprayers that allow controlled paint delivery. Cabinets have narrow rails, recessed panels, edges, corners, and flat faces, so a one-speed sprayer with poor adjustment can make the job harder.
Adjustable flow, tip size, and fan control are practical parts of key features of paint sprayer for cabinets because they help prevent heavy spots on rails, door edges, and recessed cabinet panels.
Important sprayer features include:
| Feature | Finish Benefit |
| Adjustable paint flow | Helps avoid heavy buildup |
| Multiple spray patterns | Makes doors, frames, and edges easier to coat |
| Proper nozzle size | Matches paint thickness and desired finish |
| Consistent pressure | Reduces pulsing and uneven coverage |
| Easy cleanup design | Prevents dried paint from affecting future coats |
Overspray control is also important indoors. Even a good sprayer can create fine mist that settles on floors, counters, walls, or nearby appliances. Masking and ventilation are not optional when spraying inside a home.
The right feature set gives more control, but accessories can make the working area cleaner and more efficient.
Accessories That Help Cabinet Spraying Look Cleaner
Small accessories often make a big difference in cabinet refinishing. They do not replace good technique, but they reduce avoidable finish problems.
Clean results are easier when accessories, upgrades, and enhancements for paint sprayer for cabinets support better paint filtering, safer drying space, and tighter overspray control.
Useful accessories include:
- Paint strainers for removing dried particles
- Spray shelter or plastic sheeting for overspray control
- Painter’s tape and masking film for nearby surfaces
- Door painting stands or pyramids
- Drying racks for cabinet doors
- Tack cloths or microfiber cloths
- Extra nozzles or tips for different coatings
- Respirator and eye protection
Drying racks are especially useful for large cabinet projects because doors need space to dry without being stacked or touched too early. Poor drying setup can ruin an otherwise smooth sprayed finish.
Extra tips or nozzles are worth considering when switching between primer, paint, and clear coats. A tip that works well for thin material may struggle with thicker cabinet enamel.
After the tools are ready, the final challenge is preventing common finish defects.
How To Avoid Orange Peel, Runs, And Rough Texture?
Orange peel, runs, and rough texture are the most common cabinet spraying problems. Each one usually comes from a different cause, so fixing the issue starts with understanding what went wrong.
Orange peel often happens when paint is too thick, the sprayer is too far away, or the coat is drying before it levels. Runs happen when paint is applied too heavily or the sprayer moves too slowly. Rough texture can come from dust, dry spray, clogged tips, or poor filtering.
A unit with stronger build quality can improve longevity & long-term value of paint sprayer for cabinets because repeated cabinet projects demand reliable pressure, stable spray patterns, and consistent cleanup performance.
Use this troubleshooting table:
| Problem | Likely Cause | Practical Fix |
| Orange peel | Thick paint or poor atomization | Adjust thinning, flow, or distance |
| Runs | Heavy coat or slow movement | Sand after drying and recoat lightly |
| Rough texture | Dust, dry spray, or clogged tip | Clean surface, filter paint, adjust distance |
| Spitting | Debris or poor paint flow | Strain paint and clean nozzle |
| Uneven sheen | Inconsistent coat thickness | Maintain steady overlap and drying time |
Sanding between coats can improve smoothness, but it must be gentle. Use fine-grit sanding paper after the coat fully dries, then remove all dust before spraying again.
The best approach is prevention. Test the pattern, spray light coats, keep the sprayer moving, and let each layer dry according to the paint instructions.
FAQs
Can A Paint Sprayer Give Cabinets A Factory-Like Finish?
Yes, a paint sprayer can create a very smooth cabinet finish when surface prep, primer, paint filtering, spray control, and drying conditions are handled properly.
Why Does My Sprayed Cabinet Finish Feel Rough?
A rough finish usually comes from dust, dry spray, thick paint, clogged tips, or spraying too far from the surface. Straining paint and testing the pattern can reduce this problem.
Should I Sand Between Sprayed Cabinet Coats?
Yes, light sanding between fully dried coats can improve smoothness. Use fine-grit sandpaper and remove all dust before applying the next coat.
What Paint Sheen Is Best For Sprayed Cabinets?
Satin and semi-gloss are common choices because they balance durability and cleanability. Higher sheen finishes are easier to wipe but show surface flaws more clearly.
How Do I Prevent Runs When Spraying Cabinet Doors?
Use light coats, keep the sprayer moving, maintain steady distance, and avoid lingering on edges. If a run appears, let it dry, sand it smooth, and recoat lightly.
Final Verdict
A smooth cabinet finish with a paint sprayer depends on preparation, paint quality, controlled spraying, and patient correction. The best results usually come from clean surfaces, filtered paint, light coats, and consistent movement.
When the sprayer, coating, and workspace work together, cabinet refinishing becomes more predictable and the final surface looks cleaner, smoother, and more durable.