
Cabinet paint sprayer tips help first-time DIY users apply paint more evenly on cabinet doors, frames, drawers, and detailed edges. Spraying cabinets matters because small mistakes like runs, spitting, and uneven overlap become highly visible on flat cabinet surfaces.
This guide explains how to prepare, test, control, and troubleshoot a cabinet sprayer before applying paint to real cabinet parts. It focuses on practical habits that make spraying less stressful and more predictable.
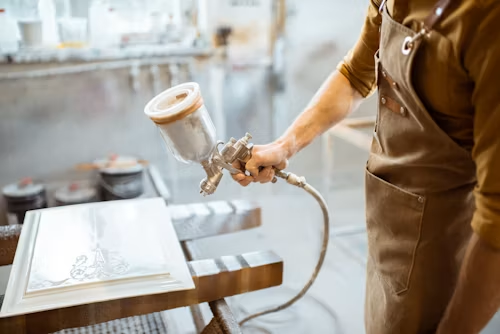
Why Cabinet Spraying Feels Different From Wall Painting?
Cabinet spraying is more demanding than wall painting because cabinets have smoother surfaces, sharper edges, recessed panels, and smaller working areas. A wall can hide minor roller marks or brush texture, but cabinet doors reflect light directly and expose uneven paint.
Many first-time DIY users do better with best paint sprayer for cabinets for beginners because simpler controls reduce the chance of flooding corners, drawer fronts, and narrow rails with too much paint.
Cabinets also require more patience between coats. A rushed coat may look acceptable while wet, but dried paint can reveal orange peel, rough texture, or visible striping.
The main difference is control. Wall painting rewards speed, while cabinet spraying rewards consistency.
Cabinet Paint Sprayer Tips Before You Start
Good cabinet spraying begins before paint enters the sprayer. Remove cabinet doors, label hinges, clean greasy surfaces, sand lightly, and wipe away dust. Kitchen cabinets often hold cooking residue that can stop primer or paint from bonding properly.
People learning how to choose the best paint sprayer for cabinets often focus on power, but paint compatibility, nozzle size, and flow control matter just as much for cabinet coatings.
Before spraying, prepare these basics:
| Preparation Step | Why It Matters |
| Degrease cabinet surfaces | Helps primer and paint bond |
| Sand glossy finishes | Reduces peeling and poor adhesion |
| Strain paint | Prevents clogs and spitting |
| Test spray first | Confirms pattern and flow |
| Use light coats | Reduces drips and rough buildup |
Always test the sprayer on cardboard or scrap wood. The spray pattern should look even from top to bottom, not heavy on one side or broken in the middle.
If paint is too thick, the sprayer may pulse, spit, or create a rough finish. Thin paint only if the sprayer manual allows it and only in small amounts.
Once the sprayer is tested, the next challenge is controlling movement.
How To Control Spray Distance, Speed, And Overlap?
Smooth cabinet spraying depends on three habits: steady distance, steady speed, and proper overlap. Hold the sprayer too close and the paint goes on heavy. Hold it too far away and the finish may dry before landing, creating a dusty texture.
For most cabinet spraying, a distance of about 6 to 10 inches works well, depending on the sprayer type and paint flow. The sprayer should stay parallel to the surface instead of swinging in an arc.
Smooth cabinet doors depend heavily on setup, installation, and usage of paint sprayer for cabinets because nozzle adjustment, flow control, and spray distance directly affect the final texture.
Use these movement habits:
- Start moving before pulling the trigger.
- Release the trigger after passing the edge.
- Overlap each pass by about 50%.
- Keep the wrist straight.
- Spray edges lightly before flat areas.
- Avoid stopping in the middle of a panel.
The goal is not to cover the cabinet in one heavy coat. Two or three light coats usually look cleaner than one thick coat.
After learning the basic motion, beginners should start with smaller projects before attempting a full kitchen.
Small Cabinet Projects That Are Easier For Beginners
A full kitchen can feel overwhelming for a first spraying project. Smaller jobs give beginners a chance to learn paint flow, drying time, sanding between coats, and cleanup without risking every cabinet door at once.
A vanity, laundry room cabinet, sample door, or a few drawer fronts usually pair better with best paint sprayer for cabinets for small projects because compact jobs need control more than maximum paint output.
Good beginner-friendly projects include:
- Bathroom vanity doors
- Old cabinet sample doors
- Drawer fronts
- Laundry room cabinets
- Garage storage cabinets
- Small pantry cabinet doors
Small projects also make it easier to set up a controlled spray area. A temporary spray shelter, plastic sheeting, or a well-ventilated workspace can reduce overspray and dust problems.
However, a sprayer is not always necessary. If the project is tiny, has many fixed parts, or cannot be removed easily, a high-quality brush and foam roller may be more practical.
Once the project size feels manageable, the biggest risk becomes avoidable beginner mistakes.
Common Beginner Mistakes When Spraying Cabinets
Most cabinet spraying problems come from rushing, skipping prep, or applying paint too heavily. Beginners often expect the first coat to look perfect, but the first coat usually looks thin. That is normal.
Uneven fan patterns, spitting, and orange peel are easier to fix when common problems of paint sprayer for cabinets & their solutions are understood before the first coat dries badly on the surface.
Common mistakes include:
| Mistake | What Happens | Better Approach |
| Spraying too close | Runs and heavy edges | Increase distance slightly |
| Moving too slowly | Thick buildup | Keep a steady pace |
| Skipping paint straining | Clogs and spitting | Strain paint before filling |
| Ignoring test sprays | Uneven pattern | Test before each session |
| Spraying dusty doors | Rough finish | Clean and tack surfaces |
| Heavy first coat | Drips and long drying time | Apply thin coats |
If a run appears, do not keep spraying over it. Let the paint dry, sand the area smooth, and recoat lightly. Trying to fix wet runs often spreads the problem.
For rough texture, check whether the paint is too thick, the sprayer is too far away, or the surface is drying too quickly. Temperature, humidity, and airflow can all affect cabinet finish quality.
The best cabinet spraying habit is patience. Thin coats, careful sanding, and proper drying time usually create a cleaner final result than forcing coverage too quickly.
FAQs
Is A Paint Sprayer Hard To Use On Cabinets?
No, but it requires practice. Cabinets need steady movement, light coats, and careful prep because smooth doors show mistakes more clearly than walls or trim.
Should Beginners Thin Paint Before Spraying Cabinets?
Only if the sprayer manual or paint instructions recommend it. Over-thinning can weaken coverage, while paint that is too thick can clog the sprayer or create rough texture.
How Many Coats Do Cabinets Need With A Sprayer?
Most cabinets need one primer coat and two light paint coats. Dark color changes, stained wood, or poor coverage may require an additional coat.
Can I Spray Cabinet Frames Without Removing Them?
Yes, but it takes careful masking. Fixed frames require more protection around walls, counters, floors, hinges, and nearby appliances to control overspray.
Why Does My Cabinet Sprayer Leave Orange Peel?
Orange peel usually happens when paint is too thick, airflow is poor, the sprayer is too far away, or the coat is too heavy. Testing the pattern first helps prevent it.
Final Verdict
A cabinet paint sprayer can give first-time DIY users a smoother finish, but only when preparation, testing, movement, and drying time are handled carefully. Start small, spray light coats, and correct problems patiently instead of rushing coverage.
The best results usually come from treating the sprayer as a precision tool, not a shortcut.